Precision is totally possible with Photoshop: here are some ways to set up your document to ensure that it is as crisp as your intention!
When designing websites, I find it useful to set the Ruler Origin to the top left of the main content column, so that the dimensions shown on the ruler relate to elements that I will code, rather than to the page background, which can vary greatly in size. Following are some tips for using the ruler, its origin and guides. Using grids can be handy, especially if you like to use a system such as the ‘960 Grid System‘, which makes it simple to layout a page by defining blocks and gutters, as occurs in print.
Using the Ruler Origin
(I used to have great trouble with changing the Ruler Origin, but I suspect that was due to a bug associated with Photoshop’s ruler.)
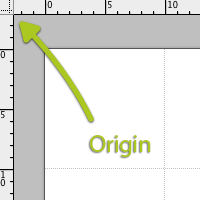
- Click and drag the origin (see diagram) to move it. This means that the ruler counts down to the left of its new origin
- Holding shift constrains guide movement to the currently selected ruler units.
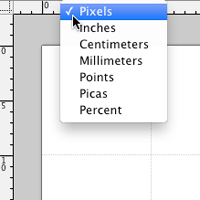
- To change the units displayed on the ruler, and hence the snapping, simply right click it. Clearly, pixels are most useful for web design, but for print I use millimetres.
- Holding the control key temporarily suspends snapping.
- Double clicking the ruler origin resets it to 0,0.
- Right clicking the origin sets it to the the last clicked point on the document. You can undo this to ‘unset’ the origin, in case the last setting was particularly delicate. Not sure why this would be useful.. but it feels tricky!


Another way of working with the ruler is outlined in the post I mentioned above:
Setting up the Grid
Note that a layer will not snap to another layer (or a guide) of that object is not visible. Snapping behviour depends on what is defined as set to snap, and whether it is visible.
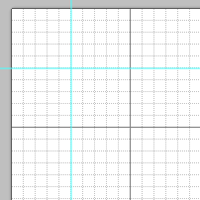
- go into Preferences > Guides, Grids & Slices, and set gridline every 10px, and 10 subdivisions (see below). Objects will snap to subdivisions as well.
- setup the document with grid visible,
- position your guides, (optionally lock them: View > Lock Guides)
- then I can hide the grid, and work to the guides alone

This is the first post in the Photoshop Precision series – check them out, and leave a comment if you’ve got something to add!