This is the second article in the Photoshop Precision series.
Photoshop sometimes appears to blur objects, lines or images. This could be due to rounding, or losing data after transforming a layer. Read on for best practice in resizing images and creating vector shapes, and come to grips with the way Photoshop displays your document.
Rounding Errors
Rounding is a result of displaying a objects of various sizes on a screen which has a finite number of pixels. Read about moiré patterns to come to grips with this!
It occurs when, for instance, you have two objects snapped next to eachother, and you change your zoom level and ghost lines appear between the objects. This is normal, and nothing to worry about: just ensure that you are looking at the document at 100% zoom (Command-Alt-Zero on Mac, Control-Alt-Zero on PC). I find that every second zoom level looks right, and I get jaggies or ghosts in between. In the images below, identical boxes are placed next to eachother, and shown at different zoom levels.
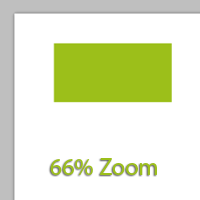
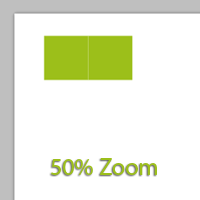
This can be disconcerting if you are editing a vector (like text), and it looks jaggy when you zoom right in. This can be useful to allow you to compare all of the objects in your document in the same scale, to help align them and so forth. If you export your document with vectors intact, the text will still be rendered dynamically in all its glory in Acrobat or Preview.
Losing detail by resizing
Blurring is not good if you’ve resized an image within your document inappropriately.
Photoshop culls data when you scale the image down, and then pixelates the image when you blow it up again. To avoid this, right click the image’s name in the Layers palette, and ‘Convert to Smart Object’ before resizing. This will embed the image in the document, and use it as a reference each time you resize the layer, avoiding the problem I’ve described.
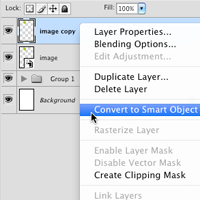
Here is an example: the circle on the left has been copied and moved to the right, then scaled right down with the transform tool, then returned to its orginal size. They would be indistinguishable if I had made the copy a Smart Object before resizing it.

Producing crip Vector Objects
If you position an object at 1.5 pixels, Photoshop will anti-alias it, resulting in the sort of blur you see in the bottom of two orange boxes in the diagram below. You can avoid this a number of ways: ensure that the object’s size is an even number of pixels, and when moving it, snap it to the underlying pixels. When drawing a Vector Object (Rectangle Tool: U) use the options drop-down and select ‘Snap to Pixels’ to guarantee crispness!
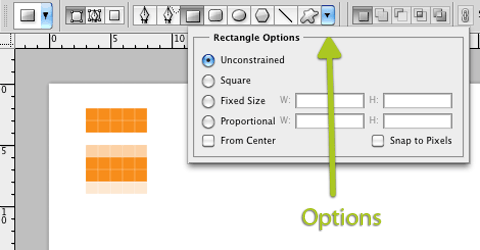
In some situations, it is simplest to create a shape the right size first off, rather than hammering something out and trying to resize it. In this case, simply select ‘Fixed Size’ in the options box displayed above. Similar options are available for other tools, such as the crop tool and free transform.
That’s it for now – if you’ve got any tips to contribute, throw out a comment – I’d love to hear about it!