This is the next installment in the Photoshop Precision series: how to cut the guesswork out of scaling and positioning your images.
You can postion and scale objects precisely using the transform toolbar, which runs along the top of the screen if it is set to visible.
To show it, you must be in transform mode (Command-T [Mac] or Control-T [PC] or Edit > Free Transform), and the options must visible (Window > Options).
Positioning an object exactly
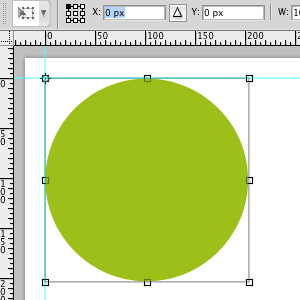
In the first of the following screenshot,
- I’ve shifted the Ruler Origin to 20,20, then
- I’ve gone into transform mode and set the anchor point to top left (by clicking the top left box in the grid of nine boxes at the top left of the screenshot).
- You can then type the offset from the Ruler Origin into the X and Y boxes. If you knew that you needed to shift the object 23 pixels down and 17 across, you could enter ‘relative’ mode by clicking the triangle between X and Y.

Scaling with precision
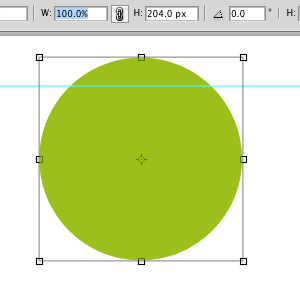
Here, I’m transforming the circle using the Width and Height controls to resize my circle. Note that the units displayed can be changed by typing them in. You can even have a mix on units! Here I’m using percentage and Pixels, which is just a gimmick :). Clicking the chain icon here is useful to ensure that aspect ratio is locked, and your object doesn’t get squashed.

You can also finetune the rotation and skew of the object using the transform toolbar, but I’m sure you’ve fugured that out already! That’s it for today; let me know if you’ve got something to add by leaving a comment!